
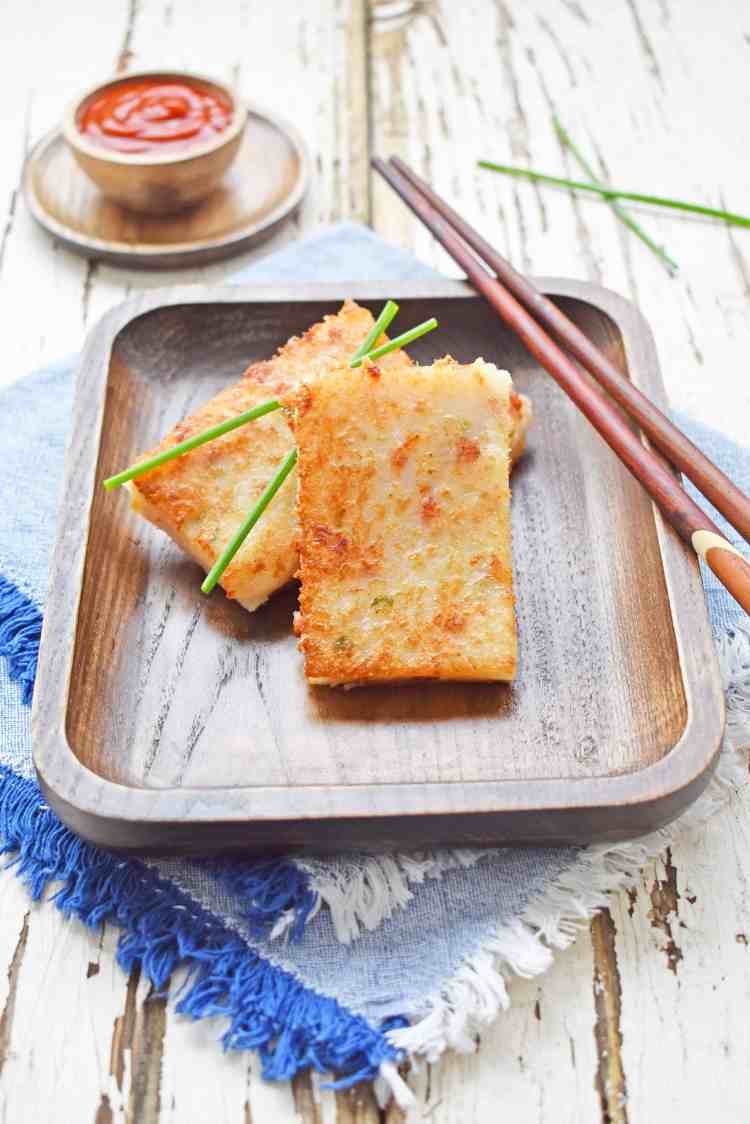
This Vietnamese turnip cake is an absolute hit in my household. It has a crispy pan fried skin with a gooey centre that is flavoured with Chinese sausage, spring onions and dried shrimp. This recipe is my mum’s cheat version, which is much simpler and quicker then traditional methods. All you will need is a microwave and a big appetite!
There are people in this world who love yum cha (dim sum) and there are those who don’t. I am one who does. I enjoy the whole experience of sharing plates and having a lot of variety to choose from. It makes the meal interactive, interesting and fun.
My personal favourite dishes are turnip cake, har gao (prawn dumpling) and tripe in black bean sauce. Admittedly, I am the only one in the family who really enjoys tripe. The others love their chicken feet and Steph is one of those who loves to claim she is no fan of yum cha at all. Yep, she makes an conscious effort of pointing this out, even though on every occasion, she will be caught stuffing her face!
Why this Recipe?
This turnip cake recipe I am sharing with you guys today is one that my mother has developed. Honestly, in the past I always avoided making this because the traditional method appeared to be hard and time consuming. That was until my mum taught me this lazy method.
By simply replacing the steamer with a microwave, making this at home is now a stress free experience! The original recipe has also been slightly modified, like the amount of turnip used to make it easier to cook and handle. I highly recommend you try this recipe if you love turnip cake and want an easy way of making it.

Getting a Good Crispy Skin on the Turnip Cake
Here are some really good advice to give these turnip cake slices a delicious crispy skin.
- Let the turnip cake cool down completely. This is because when the turnip cake is hot, it is very fragile and is hard to handle. You will often find that it will be nearly impossible to cut cleanly and crumble when frying. So, give it ample time to cool in the fridge!
- Use a non-stick pan. It just makes life so much easier.
- Make sure the pan is hot and there is enough oil. This just ensure that turnip cake won’t not stick and forms a golden crust when frying.
- Give the pan a shake. Once all the slices are in the pan, shake it and watch if there are any pieces that don’t slide. Use an egg flipper to release any pieces that are stuck and put a little more oil underneath them.
- Serve them straight away! Don’t let them sit around and get soft!


More Tips for a Successful Turnip Cake
- It is very important to shred the white turnip finely. This will make the turnip cake easier to cut and give it a smooth consistency. I usually use a micro plane or a hand grater.
- When molding the turnip cake into a pancake, use an ample amount of oil on your hands to create a smooth cake top. This is particularly important if you want a nice golden and crispy skin on the cake after pan frying.
- To avoid the edges of the turnip cake going too hard after cooking, try to make the cake uniformly 1 cm – 1.5 cm thick from the middle to the edge. This is not easy and will take a little bit of practice.
- It is important to seal the turnip cake with cling wrap before cooking it in the microwave. I usually wrap it twice to stop the steam from escaping and drying out the cake.

Other Yum Cha / Dim Sim Recipes
- Savoury Sticky Rice – Xoi Man (Cheat Version)
- Sweet Red Bean Soup – Hong Dou Tang
- Simple Mango Pudding
- Fried Bread Stick – You Tiao
Show Us Your Creations!
If you try any of our recipes, Steph and I would love to see your creations! Please share it with us on Instagram using #scruffandsteph and @scruffandsteph! We would also appreciate any likes / shares / follows on our Facebook page, Pinterest and Instagram. Thank you for your support!
– Scruff
![]()
![]()

Vietnamese Turnip Cake – Banh Bot Chien
Ingredients
- 20 gm dried shrimp, washed and finely chopped
- 200 gm white turnip, finely grated
- 2 Chinese sausage, finely chopped
- 1 tbsp sweet preserved radish / cu cai muoi minced (Optional but highly recommended and available from your Asian groceries)
- 3 spring onions, finely chopped
- 4 tbsp vegetable oil
- 1 cup boiling water
Dough Ingredients
- 250 gm rice flour, sifted
- 60 gm tapioca flour, sifted
- 3 cups cold water
- ½ tsp salt
- ½ tsp sugar
Dipping Sauces (Optional)
- soy sauce
- sriracha chilli sauce
Instructions
- In a large pot, add 3 cups of cold water and sift in the flour. Add the rest of the dough ingredients and gently whisk until all is combined. Leave aside until needed.
- In a small saucer, add the dried shrimp and enough boiling water to completely submerse the shrimp. Boil for 10 minutes on medium heat and then strain. Then roughly chop the shrimp.
- Finely grate the turnip and cut the Chinese sausage and spring onions.
- In a small fry pan on medium heat, add 1 tbsp of oil and the chopped Chinese sausage. Continually stir and cook until the oils and fragrance from the Chinese sausage is released. Take the pot off the heat and scrape all the Chinese sausage and oil into the large pot with the dough mixture.
- Heat the large pot with the dough mixture to medium high. Add the chopped shrimp, preserved radish, spring onion, grated turnip and 1 cup of boiling water.
- With a big wooden spoon, continuously stir until the mixture becomes very thick (usually about 4 minutes). Take it off the heat and continue to stir for another minute. Set aside to cool.
- Grease 3 plates (approx 26 cm / 10.25 In) with oil. With a wooden spoon, divide the mixture into three portions and place them on the plates.
- Touch the dough mixture to see if it is cool enough to handle. Once you are comfortable, put on some food handling gloves and cover your hands with some oil. Flatten out the dough on each plate like a pancake to roughly 1 cm – 1.5 cm.
- Cover the plates with cling wrap and cook in the microwave for 8.5 minutes on high. Make sure to seal it properly so the dough does not dry out.
- Leave the cling wrap on and let the turnip cake cool for at least 2 hours (must be cold to touch) in the fridge before frying. Do not cut or fry the turnip cake while hot!
To Fry (only after chilled)
- Cut the turnip cake into smaller pieces.
- In a fry pan on medium high, add 2 – 3 tbsp of oil and fry them until golden on the outside. About 2 – 3 minutes on each side.
- Serve immediately with soy sauce and Sriracha.
Reblogged this on mamabatesmotel.
Thanks mate!
Looks yummy 🙂
Thanks Mistimaan!
One of my favourite things in life is turnip cake. It brings back memories of my childhood when my maternal grandmother would make this for me.
Yep me too! My mum made it for me when I was a child.
I only tried turnip cake recently – for a Chinese New Year celebration! I loved it. Can’t wait to try and recreate at home 🙂
I hope it turns out well Alexandra!
This is one of my yum cha favourites. My maternal grandmother made this for me when I was a little boy.
Hi Gaz! Yep, this one is one of my favourites as well! Thanks for dropping by.
I tried this and it was great! Thank you so much, I don’t have a steamer big enough to hold a cake pan so this was a much more convenient way of making it!
You are very welcome Val!!! Thanks for leaving us a nice comment!
Can I eat it straight from microwave? As in the alternative to frying? Will it be same as just steamed? (the other way of eating it is steamed without frying of course)
Hi Lizzy! You can but it will be a little mushy. If you let it cool for at least 20 minutes before eating then it will harden up and be much more pleasant. Thanks for the comment!